Hello. My name's Ian Stimpson. I'm a Solutions Architect at One Identity. I'm going to be taking you through a session around Active Roles and One Identity Portfolio Integration. We're going to be looking at some of the value proposition around how Active Roles and additional solutions within One Identity's portfolio can really add additional value. This is largely going to be a demonstration session and I'm going to take you through the journey of onboarding a new user and going through these different components.
So to touch base on the components we're going to be looking at, as part of this is all around maximizing your investment in the One Identity portfolio. And in this example, we're going to touch on the integration points between some of the key components within the portfolio. So we're going to be starting our journey with Active Roles, having a look at how we can add additional value by using Password Manager, looking at bolstering our security posture with a One Identity Defender to a phase solution, and then also look at how we provide that bridging authentication using Safeguard Authentication Services. And finally, we're going to again look at how we're going to bring together these components to provide Just-in-Time Provisioning for some of your privileged identities.
Now in terms of the flow of the demonstration, what we're going to be looking at here is I'm going to be starting off with Active Roles. And we've configured some onboarding process for an account. So I'm going to manually, via the web interface, create a new account within my environment. That account and some of the onboarding processes automate a lot of these next steps to really leverage the value of that onboarding process.
So some of the onboarding templates automatically use the Authentication Services Integration Pack. So that account can then log on to Linux and Unix estate. In my example, it'll be a CentOS Box.
We will then go through the end user perspective of registering for Password Manager and we're going to look at the new Password Manager service. And then also for that same user identity, we're going to look at how they then register for the Defender Soft Token. Bringing that all together, we'll also look at this on the admin side as well, just touching on the details there. And then rounding this off, we're going to touch on the Just-in-Time access for privileged credentials within Active Directory. And that really brings together Safeguard and Active Roles to provide that level of capability.
The area that we won't be touching on, per se, is the Starling Connect, as many other sessions at Unite, they are covering the Starling Connect and the Starling cloud service and they will be touching on those areas there. But from this demonstration, we're going to take you through the onboarding of the account in Active Roles. I'll be using the manual process and then in the background, a lot of the automation in Workflows will be kicked off and then we'll take you through that "use at the end" user perspective and the administration perspective to really look how you can maximize the value from your One Identity investment. Now you might be just starting off with Active Roles, you may have been using Safeguard, but it will bring together how these solutions can work together to add additional value.
So for this demonstration, we're going to start off our journey within Active Roles. So I'm in the Active roles web interface. I'm just going to refresh and make sure my connection is still active there and it is. So you can see I've logged in as myself, as Ian Stimpson.
This demonstration environment is set in such a way with different levels on the help desk, different sets of processes. I'm logged in using a help desk level three role, so I've got the visibility and the privileges to administer Active Directory via Active Roles as it's laid out in this demonstration here. So we've got our manage units that are configured. That gives me that capability of managing those objects and the permissions with Active Directory and I've also got a set of personal folders down here as well.
So I'm going to go into my personal folders and go to the UK location. And within here, we're going to start this demonstration process by creating a new user in Active Roles. So within here, let's do new user. And what I'm going to do, I'm going to use one of my colleagues. I'm going to use my colleague Zoltan for this demonstration.
So putting in Zoltan's name, Zoltan Bakos, and you can see part of the new employee provisioning process is made to standardize login name, first name.last name. We can also then have a dropdown for the different sales department. So for Zoltan, I'm going to put him in our engineering department. We've set the email address and we can then also set the office locations. So as Zoltan, my colleague, is based out of our Germany location, I'm going to put him in the Germany office there as well.
So again, I'm just showing this as a manual process. Typically, organizations will use an onboarding system that might be connected or a CSV file to import and do this provision in process. So I'm going to create a password here for Zoltan. And as you can see, we can automatically create the password and have this spelled out to the user, but for demonstration purposes, we're just going to set this manually and I'm going to put on here that the password never expires.
Now the second part of this onboarding, I'm connecting this to my Office 365, to my Azure environments. So I'm going to create Zoltan in Azure. I'm going to put down his user principal name as Zoltan.Bakos@OneIdentity.co.uk. and I'm just going to put in the usage location for the mailbox as GP for this purpose.
Now the next part of this is having that capability to managing the licenses within Office 365. So I'm running a developer part of my Visual Studio developer license. And this is an E5 developer license, so you can see here I'm going to assign all of these licenses to Zoltan and it tells me how many I've got left out of the 25 that I've been provided.
Now this does give me the flexibility of having my plans available here so I can then administer the licenses for Office 365 from this central web interface. Now the next part of this onboarding, I am then going to select the admin role. So within here, I'm going to say, OK for Zoltan, does he need any Office 365 roles to be administered?
So I'm just going to click a few here. I'll just add in a few, just so you can see this for demonstration purposes. And we select the roles that Zoltan has the capability of doing when in Office 365. So I'm going to click on finish there.
And what we'll see here is in the background, this has now followed the new employee onboarding provisioning process. So we can see our user Zoltan that's been created. We can see him within here and we can see the different details for Zoltan.
Now if I was to go to see the member of, we can see that that new employee provisioning process has automatically added Zoltan to certain groups. So we've got our Defender Self-Service, which will become clear as we go through this demonstration for registering for our Defender two-factor authentication and we've also added him to our Safeguard Privileged Admins group, so that Zoltan can log into our Safeguard vault.
Now in addition here, you will also notice we've got our Azure properties and also our Unix properties here as well. So I'm going to come on to those in a moment. But firstly, I'm just going to the general properties of Zoltan. One thing that I do need to assign to Zoltan is a mobile number and this is for part of our provisioning process for some of the other demonstrations here as well.
So I'm going to add in my mobile number here for Zoltan. So I've put in my telephone number there for Zoltan. Now we can also see within here, it's got the visibility of the users, so we'll just save that. I'm also going to put that into my mobile field here as well, click on save, and what I've just added is the mobile number there for Zoltan.
So off the bat, what we've actually provided there, we've onboarded the user, kicked off a certain set of auto provision policies. In the background, we've enabled the user to log into our Linux Unix estate and we've also provisioned a mailbox on Azure there as well. This has also laid the foundation for Zoltan to do some of the self administration as we go through the details here.
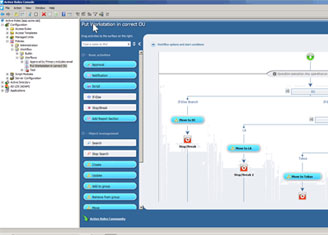
So with that, let me just go into the Active Roles console and we'll see the new employee. So as I said, this is a demonstration environment. I've got a policy for doing new employee and within here, we're using some of the out-of-the-box templates and the out-of-the-box policies. And we're validating some of those properties, we're doing the naming standards. You can see within here we've also then provisioned a Unix group and a Unix user there as well.
So because Zoltan is our new employee, one of the first things we can do here-- let me just minimize all of this down-- is I'm going to bring up my KITTY client and I'm going to load access to one of my CentOS Boxes. So let's load this up on the screen here and we'll open this up.
Let me just increase the screen size here. Let me go down to the appearance. Let's go down to here. Let's just put this up about 16 or 18, just so it's coming across a little clearer on the recording there. Let's do a 16, apply, and hopefully you can see that a little bit clearer there.
So our new user Zoltan has been created. This means that we can now log in as Zoltan. So what I've done there, I've entered in Zoltan's details. We can see here there's been a banner that's popped up on the screen telling us that all connections are monitored via Safeguard, so that's important. So the first step was Active Roles using the Safeguard Authentication Services Integration Pack has enabled our user on the initial creation to be given a Unix profile.
This means that Zoltan can now log into, in this example, our CentOS Box using his Active Directory credentials. But importantly, to add additional value, we're actually monitoring that connection via Safeguard as well. So this means that we can blacklist certain commands and we've got the visibility of what Zoltan is actually carrying out on this target asset.
So as you can see, we're logged in here is as Zoltan, but this example demonstration is really just showing you the art of the possible. And in stage one of this demonstration, it's really showing you how creating that new user in Active Roles can increase the efficiency of your organization and improve your security posture by creating that account so that it's Unix enabled, so the user's part of that role can log into Unix and Linux accounts. And we're also monitoring that connection via Safeguard as that's where the session is actually going through. So again, really powerful way of doing that.
So the next part of this demonstration-- let we minimize this screen down here-- we're going to take you through the Password Manager. So it's been on the screen here. Let's bring up a new screen and I'm going to bring up the Password Manager user self-service interface. Now what this is looking at achieving-- there's many capabilities and the essence, really, is around providing the value and providing a mechanism for your users to self-administer their passwords.
So you can look at many different articles around the amount of calls that help desks experience that are password-related and it's been the same in the last few years as it is 15 or 20 years ago. So the objective of this is to give back that capability for password resets to the end user, but also add an additional value from the organization's perspective by overlaying strong password policies and also providing an interface that the help desk can actually verify the identity of the user if they did look to contact the help desk to change their password by issuing a temporary token. So first step here, we're going to find our new user Zoltan.
So we can type in the username and click on search. And we can see that our user Zoltan is unregistered. Now the first part here for anyone who has used the One Identity Password Manager, this is the latest interface, the new web interface. It's a really clean, nice interface for our users to start using. So we're going to go through the journey of registering our new user.
Now first thing Zoltan needs to do is enter in his AD credentials. So he's logging in here. And I've set up some default questions for the purpose of this demonstration. So name where he first lived, mother's maiden name. And there are questions that can be prompted for the user to answer to reset their credentials. Now from my security posture perspective, it's advised that you can also use or instead of use a token to authenticate the user to reset their password.
Now the benefit of Password Manger is it allows you to derive and create a policy that best fits your security practices. So it could be some users that might be office-based, low-privilege users, you might allow them to reset their password with a question and answer. Certain users with different privileges, you might request that they can only do it with a token. So again, it gives you that capability of fittedness around your different processes.
So for Zoltan, let's put in the street where he first lived. So I've just got some default answers here for the demo purposes and a mother's maiden name to go in the details here. Now the other thing to make note of is in the documentation for Password Manager, we do actually provide a set of questions that you can use as a basis for formulating the questions into your policy. So again, saving you time on the details there.
So help desk operators, these are presented with these questions so that they can then say, "Answer character number two or character number six to prove and validate your identity." So again, we've put a couple of questions in here, name of the first pet and we're going to have a childhood superhero here as well. So Zoltan's now provided those answers, click on continue, and we can see that success, it's been successfully registered.
So we've taken Zoltan, we've created the identity in Active Roles, we've shown how we can do that Unix authentication log on, and we've now enrolled Zoltan in the password self-service. Now from this point, we provide the ability for these users, for Zoltan, to reset his password. Now he can do this by going to the website interface. We also have a credential provider plug-in to the desktop to enable the user to change his password from that basis there as well.
So for the demonstration purpose, we're going to do the forgot my password on the details here. So let's click on forgot my password and what you can see here is we've integrated as part of the profile, part of the Workflow on policy, that in order for Zoltan to reset his password, he's going to use a stepped up authentication. So he needs a second factor to reset his credentials. Now this was part of the reason why I entered in my mobile number as part of this process because our policy dictates that for Zoltan to change his password, he needs to use a second factor of authentication.
So we're going to do a push notification here. And what I'm going to do on this area here, I've mirrored my iPhone. I'll just bring this up onto the desktop. And we can see here, we've got Starling 2FA. Tap to authenticate, Zoltan Bakos, approve.
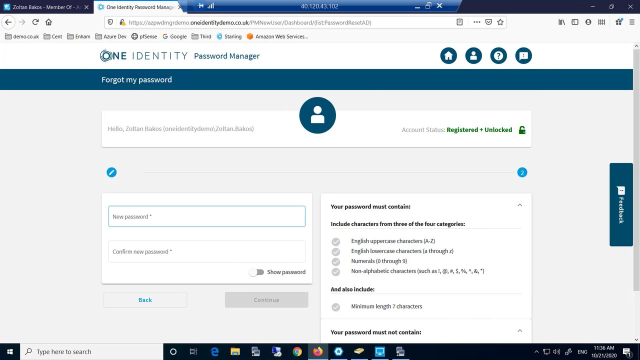
Now what that has done is using the Starling Approval Anywhere to validate the identity of Zoltan. And that allows Zoltan to now to reset his password. So we can see the password interface here and it's requesting for Zoltan to enter in a new password.
And the additional benefit here is we can see that, based on our password policy, we're actually informing the user-- I didn't get it right, I'll just do that again-- so we're informing the user that the password is matching the password policy that's been set by the organization. So again, it's never a guess mark, do we need to put uppercase or lowercase. It's visually providing that level of information to our users. So again, really powerful there.
Now the other area to mention on here is there's an additional capability around checking the credential against a .bat list of misused or hacked passwords. So again, it can actually go out and check that the password that's been entered by Zoltan hasn't been on a breached list. So again, adding additional value there as well.
So let's click on continue. And we've now shown the capability of Zoltan registering for the password self-service using Starling Approval Anywhere with the two-factor authentication to validate his identity to enable Zoltan to reset his password. So with the areas there-- let me just sign out of the interface. And I'm now going to go into the admin interface.
And then this time, I'm going to go into the admin interface as myself. So I'm logging in as Ian Stimpson with my credentials. And again, this is really just showing it from the admin side.
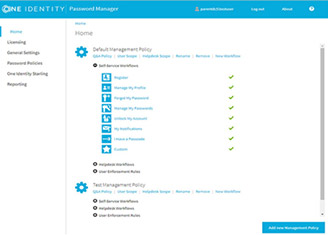
So we have our default management policy Let's just move that "have a message" off of there. So we've got our default management policy with our different self-service Workflows. We also then have a help desk policy here as well. And again, step through these different Workflows for us as a help desk or as an administrator to set the different configuration tasks. But if we go to the self-service workflow-- so again, I'm in as the administrator-- we have our forgot password Workflow.
And we can see within here that I've got is the first step the user needs to authenticate with the Starling Approval Anywhere, the Starling two-factor authentication. But this gives you the ability to then configure the different processes that are right for your organization. So that was from the admin side. And again, there's many more capabilities that can be configured here.
We've got the different password policies that can be applied, that dictate the amount of characters and how strong the passwords need to be. And then you've also got the different scope of where this is applied to. So my default management policy really is applied to most of my users within my domains, all my domain users, but it's not applied to my admin accounts. There's an excluded OU. So again, it gives you the flexibility to configure this based on the specific requirements of your organization.
And the final part of this is we're going to go into the help desk. And I'm going to now log in as the help desk user and this could be that whereby we always try and get our users to do the password self-service. There could be situations whereby they still need to contact the help desk, so I've got my user Keith that sits on the help desk.
And within here, this gives Keith the ability to search for accounts. So if I was to search for Zoltan, we can then find the account of Zoltan and then Keith can go through the details of resetting the password for Zoltan, issuing a temporary code so Zoltan can log on. But again, all of these things that we've been looking at here are fully driven by the policy. And that includes the ability to allow users to search for themselves or the help desk to search for users or to enter in their fully qualified names.
So we can then say, OK, we can verify Zoltan's identity by asking him some authentication questions, we can assign a passcode. So again, allow Zoltan to reset his password if he's not registered with Password Manager, unlock the account. That also tells us any disabled accounts and disabled tasks that have been carried out here as well.
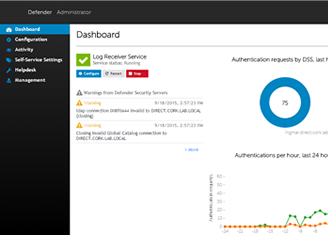
What the next part of our joined look demonstration here is we're going to look at Defender. So Defender provides two-factor authentication for our users. It's a software-delivered service.
And again, this really does bolster the defenses because the security weaknesses around passwords are fully known. One of the best ways of improving your security posture is by adding two-factor authentication to your environment. And that's what we're going to be looking at here with Defender.
But the important thing is you need a two-factor authentication solution that is easy for users to use because the last thing you want is to have a cumbersome process of doing self-registration that mitigates the benefits that you obtain from a 2FA solution. So with here, we're going to go in now as our new user Zoltan. So I'm logging on with a password that we've just reset, we're signing into my One Identity demo domain, and I'm now going to log in as Zoltan.
So part of the Active Roles onboarding, we added Zoltan to the self-service group and this gives us the ability here to allow Zoltan to register for a token. In our example, we're going to register for an iOS token. So again, we click through the details here. And it's really intuitive, really easy to use as we'll see in a moment. So I'm going to click on next.
And what we've done here is we've actually sent a verification code to Zoltan. Now part of Active Roles onboarding, you noticed that we created an Office 365 account for Zoltan. So we now need to go into that Office 365 account to retrieve his verification code.
So let me bring up a new tab. Going to go into Office 365. And we need a different user. It's not Alan Radford that we're signing in at the moment. So choose a different account. So Zoltan.Bakos@OneIdentityDemo.co.uk. Now we're going to put in a credential here for Zoltan and sign in.
So what you'll also see here as obviously at the start of this demonstration, we created Zoltan as a new user. So going into Office 365, it's going to be obviously the initial steps when you first go into Office 365. So I'll come out of the details there.
We can go down to our mailbox and this will most likely is going to be in the junk folder and I'll explain the reasons why that will be. So I'm just going into Outlook for the first time and what we're looking for is the registration from Defender. And as I said, it's gone into the junk mail folder here. And the reason for that, I'll show you when we open this up.
It's because I'm actually coming from a 10-zero address, which is why Office 365 has picked this up as potentially a junk email. But what we need to do here is quite simply, I can just click on that and paste it into a browser or I can paste the code into the registration process. So we're going to copy that, go into Defender, click on paste, and that verifies Zoltan as part of this registration process.
So the next part for the users and this is why it's really user-friendly, really easy to use, is all the user needs to do is actually bring up their iPhone, that Defender token that they download from the App Store, and then they just click on that QR code to register their new Defender token. So if I go into here, I'm just going to-- again, going across my mirrored iPhone-- I'm going to click on scan QR code and we can see within there, Bakos. So I'm giving this token a name. The reason for this, I've got quite a few demo users I use here, but we can see at the bottom there that's our Zoltan Bakos token that we've created. So let's move that off the screen and we'll click on finish.
So hopefully that explained and showed how quite straightforward it is from an end user's perspective to actually register themselves for a Defender token and start using that token. So in order to test out the token-- really again, to show some additional capability for this part-- I'm then going to switch over to our Safeguard. We're going to log into our Safeguard vault as Zoltan and I'm going to turn on two-factor authentication for our user.
So it lets me bring up my Safeguard client here and as you can see, I'm logged into my Safeguard privileged passwords client. I'm logged in as myself. If we go over to our users section, you might remember that when we had Active Roles, when we started the process with Active Roles, we created our user Zoltan.
That user identity was created and added to a group called Safeguard. That means that Zoltan can log into the Safeguard vault using his Active Directory credentials. Now just do a quick refresh on here. If I bring this down all the way, we can see Zoltan Bakos.
Now, as I said, Zoltan can log into our vaults as a user using his Active Directory credentials, but what I'm going to do is open up Zoltan's property, go to the authentication tab, and select that Zoltan requires secondary authentication. Now I've got two providers configured, one of which is our Starling Approval Anywhere and Defender. So I'm going to select Defender and we've then got Zoltan's login name.
So he can log into this, click on OK, and this now means that when Zoltan goes to log in, it's going to prompt him for a second factor of authentication. So for this purpose, we can use the web interface for Safeguard, but I'm actually going to log out of the desktop client and I'm going to log back in as Zoltan. Click on log in and what you'll see here is-- I think I'll bring this over-- you'll see that we've got a token here for Zoltan that is required to step up that authentication.
So what we've shown there in literally those five minutes is our user Zoltan registering for a Defender Soft Token, going through the registration process, obtaining the registration code from his Office 365 mailbox that was created via Active Roles, and then this allows Zoltan to log into the Safeguard vault. So to kind of bring this demonstration to the final part, this part, we're going to allow Zoltan as part of his privileged role to check out some credentials for our Active Directory domain. And we've got a couple of user groups within Active Directory that are managed via Safeguard.
So within here, we have some privileged used objects and these are our Safeguard temp DOMADMIN1, DOMADMIN2, enterprise admin one and two. And what you'll see is these accounts at this moment in time are actually disabled, so you can't use these accounts to log in. And the accounts themselves are only a member of the domain users group. Now part of the Just-in-Time Provisioning for Safeguard allows these privileges to be assigned at the time of the credential checkout. So, as Zoltan, we're going to make a new request.
We can see all the different resources that Zoltan's got default access to as part of his initial group membership. And in this example, we're going to select the Azure Active Directory here. We're going to select the accounts. So again, these are different accounts that he can check out for credentials. And we're going to select the Safeguard temp DOMADMIN1. Click on OK.
And when I click on next, what's going to happen is that account is going to be activated and it's going to be added to this group within here. So there's no group members at the moment and that group is a member of the domain admins, so this provides that Just-in-Time Provisioning and the credentials to be provided. Now the reason I'm showing this in the desktop client and not in the web interface is you'll see when I click on next that the account is going to go from pending restored to activated.
So we're requesting this immediately. Click on submit a request. And you'll see on here, it's going to go from pending account restored to being available. So again, we can go into here, you can see what the credentials are, and I could use those credentials as I need to.
But the important thing there is Zoltan has checked out those credentials, it's restored the account, and then importantly, if we go into Active Directory users of computers, we can see that-- refresh the screen here-- that that account is now active and that account is now a member of the temp DOMADMIN group. And that temp DOMADMIN group, if we go into here-- again, we'll see that it's got that temp DOMADMIN account as a member and this is a member of the domain admin. So this gives you the flexibility of providing that Just-in-Time Provisioning and controlling the security to those different groups.
Now the important thing here is once Zoltan or my privileged user has finished using this privilege credential, they can quite simply, checking those details or checking that credential, and that's then going to set the account as being disabled. So it can't be used and also, it's removed the membership. So let's refresh here. We'll then see that it's gone back to being disabled. And we can also see within here that it's been removed as a member of that temp DOMADMIN group.
So in conclusion, we have seen how bringing together your investment in One Identity from Active Roles onboarding that new user, how that account can have automated processes. So we've created an account in Azure, we've automatically added Zoltan as our new user, to the capability to log in via authentication to our Unix and Linux estate. In our example, it was a CentOS box.
We then looked at the self-service registration for Password Manager and how we can provide the additional benefit of removing the load on the help desk by allowing our users to reset their own passwords using a strong authentication mechanism and adhering to the corporate password policy. We then looked at how we can bolster our security posture by adding in two-factor authentication by using One Identity Defender. We looked at how the process of that self-registration is really straightforward, allows our users just with a few clicks to register a token. The example we used was a software token for the iOS platform. And then we looked at an example of using that token.
And we have, as part of the Active Roles onboarding, Zoltan our new user was added to a Safeguard group. That group gave Zoltan the ability to check out certain privileged credentials. And in the example, we used Defender to provide that second factor of authentication for Zoltan. And then Zoltan proceeded to request a credential for Active Directory. And that was using Just-in-Time provisioning between Active Roles and Safeguard.
I hope you found this session informative. And as I said, my name Ian Stimpson. Thank you very much for listening to this session.
 33:25
33:25
